Heavy-Duty Rivet Nut Tool Kit: 14″/16″ SAE & Metric
14″ & 16″ Rivet Nut Tool Kit with SAE & Metric Mandrels: Fast, Reliable Threaded Inserts
A heavy-duty rivet nut tool kit makes it possible to add strong, reusable threads to thin sheet metal, tubing, and panels—without needing access to the backside. With two handle length options (14″ and 16″) and both SAE and metric mandrels, this kit is set up for common automotive, fabrication, and DIY repairs where clean threads and consistent pull strength matter. If you’ve ever fought stripped sheet-metal screws or wished a bracket could be removed and reinstalled without drama, rivet nuts (also called rivnuts or nutserts) are one of the simplest upgrades you can make. For more guidance, see DIY Unistrut/Superstrut Bed Rail System – Nissan Frontier Forum.
What a Rivet Nut Tool Does (and When It’s the Right Choice)
A rivet nut tool installs a blind threaded insert into thin material by collapsing the insert body from one side. Once set, you get a permanent internal thread you can bolt into repeatedly—similar to having a captive nut where you couldn’t otherwise reach.
- Creates a permanent threaded insert (rivnut/nutsert) in thin materials where a standard nut and bolt can’t be held from behind
- Useful for sheet metal, box tubing, van/overland builds, body panels, racks, brackets, and equipment enclosures
- Helps avoid stripped sheet-metal screws and reduces the need for welding when serviceable threads are preferred
- Ideal when repeated assembly/disassembly is expected (access panels, mounts, removable guards)
For background on how blind rivet nuts work and why they’re commonly used in manufacturing and field service, see PennEngineering’s overview of blind rivet nuts.
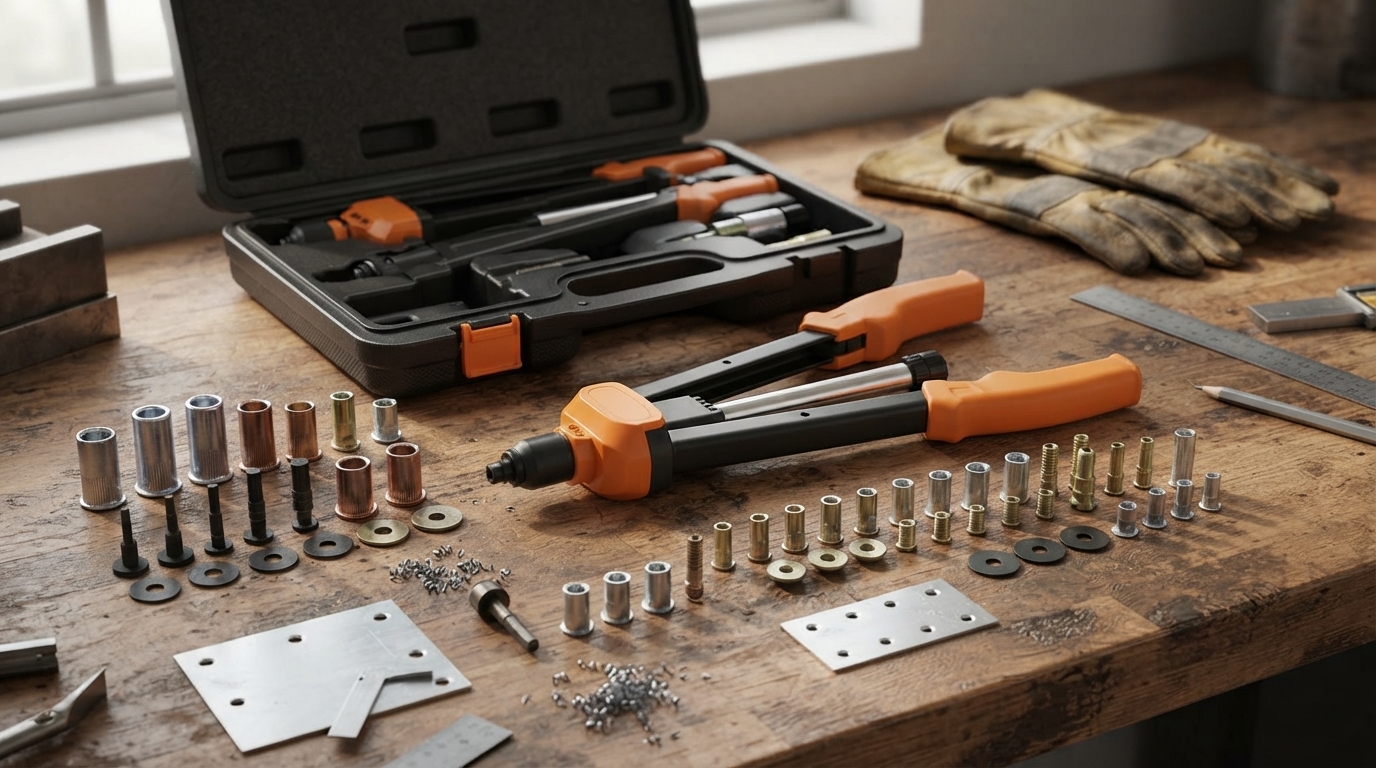
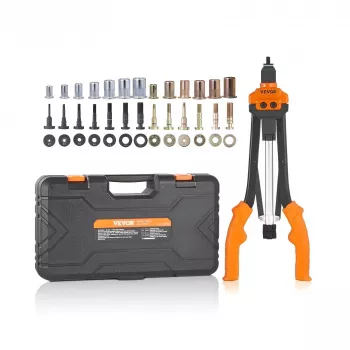
What’s Included in the 14″ & 16″ Heavy-Duty Kit
This kit focuses on two things that matter when you’re installing threaded inserts all day—or just want it to go right the first time: leverage and compatibility. The two handle lengths help you adapt to the jobsite realities of tight access and varying insert sizes, while the SAE and metric mandrels keep you from forcing mismatched threads.
- Two-handle-length setup (14″ & 16″) to balance access in tight spaces vs. leverage on larger inserts
- SAE and metric mandrels to match common fastener standards on vehicles, shop equipment, and mixed hardware bins
- Designed for repeatable setting: consistent collapse of the rivet nut body for stable threads
- Good fit for maintenance kits where one tool needs to cover multiple thread systems
Quick Compatibility Checklist
| Job need | What to match | Why it matters |
|---|---|---|
| Mounting brackets on thin sheet | Rivet nut body size + proper drill hole | Prevents spinning and improves clamp load |
| Mixed hardware (SAE + metric) | Mandrel thread standard | Avoids cross-threading and damaged inserts |
| Larger inserts or harder material | Longer handle leverage (16″) | Reduces effort and improves consistent set |
| Tight access areas | Shorter handle reach (14″) | Better control in confined spaces |
How to Use a Rivnut Tool for a Clean, Strong Set
A good installation is less about brute force and more about the basics: correct hole size, the right mandrel, and keeping the pull square. These steps help the insert collapse evenly so it locks into the panel and leaves threads that feel smooth—not gritty or distorted.
- Step 1: Choose insert type and thread (metric or SAE) based on the bolt that will be used later
- Step 2: Drill the correct hole size for the rivet nut body; deburr both sides to help the insert seat flat
- Step 3: Thread the rivet nut onto the matching mandrel until fully seated against the tool’s nosepiece
- Step 4: Insert the rivnut into the hole so the flange sits flush; keep the tool square to the surface
- Step 5: Squeeze/operate the handles to collapse the rivnut; stop once firmly set and flush (avoid over-crushing)
- Step 6: Reverse/unthread the tool from the insert; test with the intended bolt to confirm smooth engagement
Tip: If an insert spins, the hole may be oversized, the material too thin for that insert, or the set wasn’t fully collapsed. Many manufacturers also publish grip range and hole guidance; Stanley Engineered Fastening maintains reference material in its Riveting Handbook resources.
Choosing Between the 14″ and 16″ Handle Options
Handle length changes how the tool feels more than most people expect. The 16″ option gives a smoother, easier pull—especially on larger inserts—while the 14″ option can be the difference between “fits” and “won’t clear the obstruction.”
Common Mistakes and Simple Fixes
Where This Kit Fits Best
Product Option Available Now
FAQ
What’s the difference between SAE and metric mandrels?
Mandrels must match the internal thread of the rivet nut. SAE mandrels use inch-based thread pitches (like 1/4-20), while metric mandrels use millimeter-based sizing (like M6). Using the wrong mandrel can damage threads or bind the insert on the tool.
Why does a rivet nut spin in the hole after setting?
Common causes include an oversized hole, the wrong grip range for the material thickness, or an incomplete set from insufficient compression or a crooked pull. Paint, dirt, or burrs can also prevent the flange from seating flat. The fix is usually replacing the insert, drilling the correct hole size, and setting it square and fully seated.
Can rivet nuts be installed in stainless steel or thicker materials?
Yes, but hardness and thickness change the force required and the insert style that works best. Stainless or thicker material may need more leverage (often favoring longer handles) and careful attention to the insert’s recommended hole size and grip range so the collapse forms correctly.


Leave a comment